
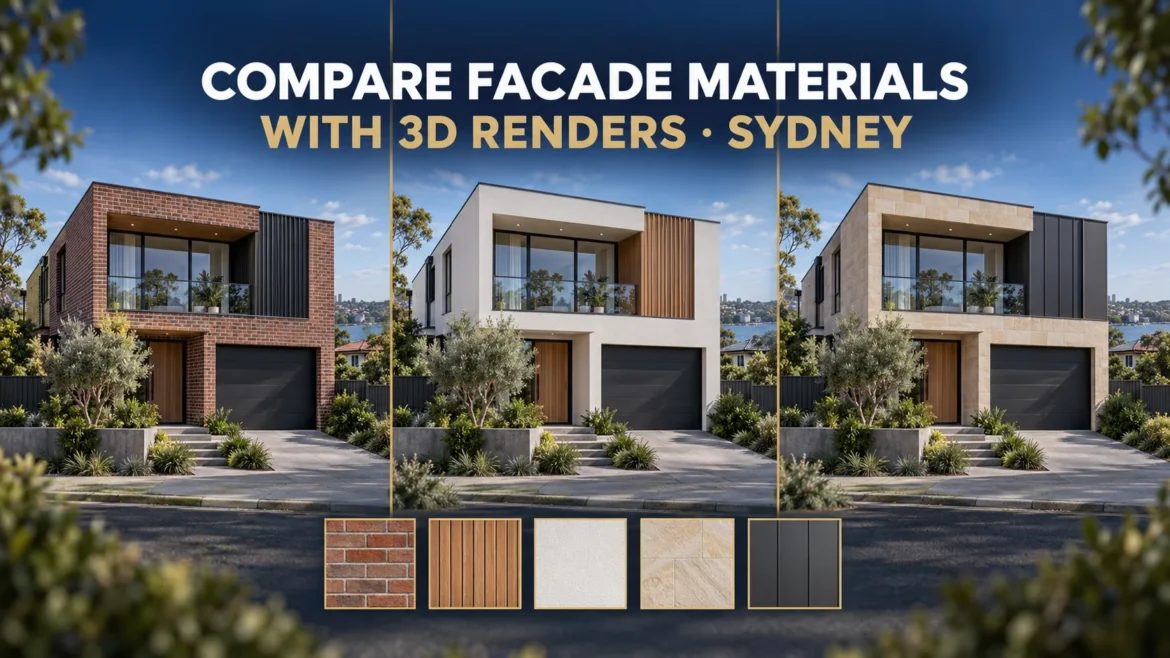
Compare Facade Materials with 3D Renders | Sydney
Materials · Facades · Design decisions
Compare Facade Materials with 3D Renders: A Guide for Sydney Builders and Architects
Brick, cladding, stone and painted finishes can change how a facade reads. Use controlled visual comparisons to help clients understand their options before confirming a material selection.
How should facade materials be compared?
Compare facade materials using the same building geometry, camera, lighting and landscape. Change only the specified material or clearly labelled palette. Check product references, texture scale and joints, then confirm important selections with physical samples. A rendered image supports a visual decision; it does not guarantee an exact real-world colour match.
Decide whether you are comparing a material or a whole palette
A client choosing between two bricks faces a different decision from a client choosing between complete facade schemes. Define that decision before producing the images.
For a single-material comparison, keep the surrounding finishes unchanged. For a coordinated palette comparison, list every component that changes, such as brick, mortar, cladding, window frames and garage-door colour.
For Sydney builders presenting a facade range, also identify which finishes are standard inclusions and which are upgrades. The images and the selections schedule should describe the same offer.
One material
Compare a single documented change while holding the rest of the facade constant.
A complete palette
Compare coordinated schemes and label all the finishes that vary between them.
A design variant
If windows, rooflines or wall positions change, identify the option as a design change.
Keep the camera, lighting and surroundings consistent
A brighter sky, a different camera angle or richer planting can change the appeal of an image without changing the material. Controlled facade material comparison renders keep these presentation conditions consistent.
Approve the base geometry and viewpoint first. Then create the agreed options using the same lighting, exposure, landscaping and surrounding context. This makes it easier to judge the actual finish differences.
| Element | Comparison approach | Reason |
|---|---|---|
| Selected finish | Change according to the material schedule. | This is the decision being evaluated. |
| Building geometry | Keep unchanged for a material-only comparison. | Avoid mixing design and finish decisions. |
| Camera and crop | Use the same viewpoint and framing. | Keep visible proportions comparable. |
| Lighting and exposure | Use consistent settings. | Avoid favouring one option through presentation. |
| Landscape and styling | Keep the same arrangement. | Prevent unrelated visual changes from dominating. |
For the wider context of facade and streetscape imagery, explore our exterior 3D rendering guide for Sydney projects .
Review texture scale, joints and product references
A realistic-looking texture can still represent the wrong product. Supply the actual product references and relevant dimensions wherever available.
For brickwork, review the unit proportions, bond pattern and mortar appearance. For cladding, check board widths, panel divisions and joint direction. For stone, confirm the intended pattern, scale and variation.
Review the facade at two scales: a whole-building view to assess the overall balance, and a closer crop to inspect the important material details. Use the closer view to identify modelling or texture issues before final approval.
A render is not a physical sample
Screen settings, lighting, image processing and natural product variation affect appearance. Use the visuals to compare the design direction, then confirm critical finishes using product information and physical samples under appropriate viewing conditions.
Worked example: comparing three facade schemes
Imagine a residential builder comparing a light brick scheme, a darker brick scheme and a mixed brick-and-cladding scheme for the same home design.
The first two images can isolate the brick selection if the remaining finishes stay unchanged. The third is a broader palette comparison because the material distribution also changes. Label that distinction rather than presenting all three as equivalent single-product choices.
Keep the camera, sky, landscaping and building geometry identical across the set. Give each scheme a name that matches the selections schedule, then record the client’s preferred option and any remaining questions.
Illustrative example: this describes a comparison method, not a completed 3D Space Design project or a measured client outcome.
What to include in your facade comparison brief
- Current design information: elevations, relevant plans and sections, or an available model with its revision clearly identified.
- Option schedule: a list of materials or palettes, including exactly which facade areas change.
- Product references: manufacturer references, sample photographs, dimensions and relevant joint or installation patterns.
- Inclusion labels: identify standard finishes, upgrades and options that are still subject to confirmation.
- Comparison conditions: agree the viewpoint, lighting and surrounding context that will stay consistent.
- Review responsibility: name the person who consolidates feedback and confirms the selected option.
For a wider list of useful project inputs, see our Sydney 3D rendering brief and file checklist .
Keep the approved image connected to the specification
Record the selected palette name, drawing revision and material schedule version when the comparison is approved. Use those same identifiers in the final image filenames and presentation captions.
If the product or facade design changes later, review the affected images. An old visual approval should not silently become approval of a different specification.
A separate atmospheric marketing image can be produced after the selection. Retain the controlled comparison as the record of what the client actually reviewed.
Common questions about facade material renders
Can 3D renders show the exact colour of a facade material?
They can communicate the intended appearance, but they cannot guarantee an exact colour match in every viewing condition. Confirm important selections with physical samples and the actual product specification.
Should we use daytime or dusk renders to compare materials?
A consistent daytime setup is a useful starting point for reviewing visible finishes. Dusk imagery can support a separate lighting or marketing brief. Avoid comparing one option in daylight with another at dusk.
Can we compare brick, cladding and stone in the same set?
Yes. Define the material placement and identify whether each image changes one product or the whole palette. Keep the underlying geometry and presentation conditions consistent where a controlled comparison is intended.
How many facade options should we commission?
Start with the documented options the client is genuinely considering. If the direction remains uncertain, resolve broad palette preferences before commissioning numerous detailed variants.
Does a material render confirm technical suitability?
No. It communicates appearance. Product suitability, installation requirements and technical performance must be checked through the relevant design and specification process.
0 comments